Managing Kafka Using Shell / SSH
The Shell / SSH service enables you to use Linux commands to manage your applications on the client panel. You can issue commands as if you are inside a container and perform local operations like monitoring, debugging, and using CLI commands specific to what is running in the container. This article will show you how to manage your Apache Kafka using shell / SSH.
Note: For the security purpose, only the account holders who pass our verification will be granted permission to the Shell / SSH service. If you would like to enable it, please update your billing information. Our staff will finish verifying your information within 2 hours.
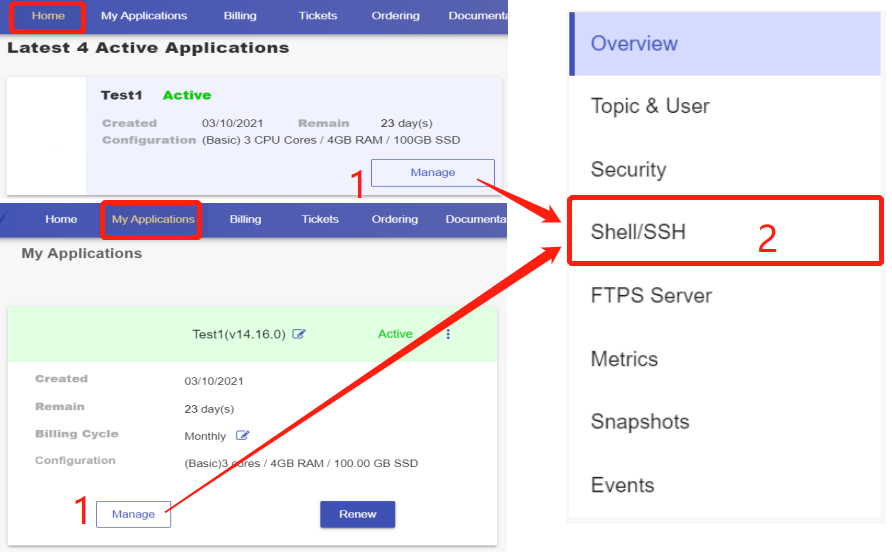
1. Locate the application
Log in to the Client Panel and locate your target deployment on the Home page or the My Applications page.

2. Navigate to the "Shell / SSH" page
Click the "Manage" button on the Home page or the My Applications page. Then Click the "Shell / SSH" tab in the menu bar.
On the Shell / SSH page, you can see a "Connect" button, which is only open to the accounts that has passed our verification process for security reasons. To update your billing account information, please log in to the client panel.
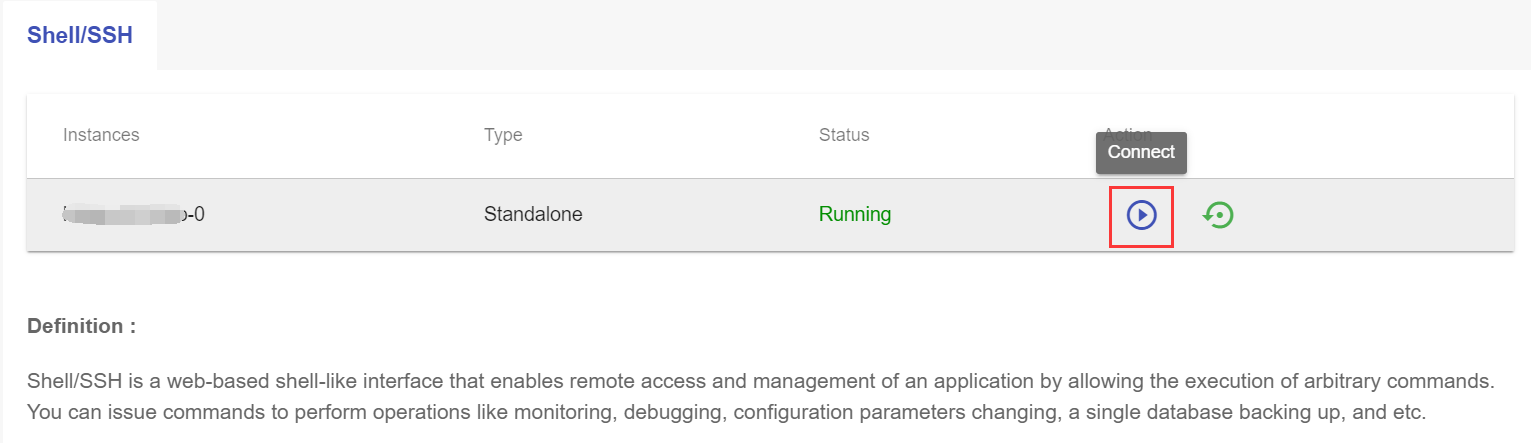
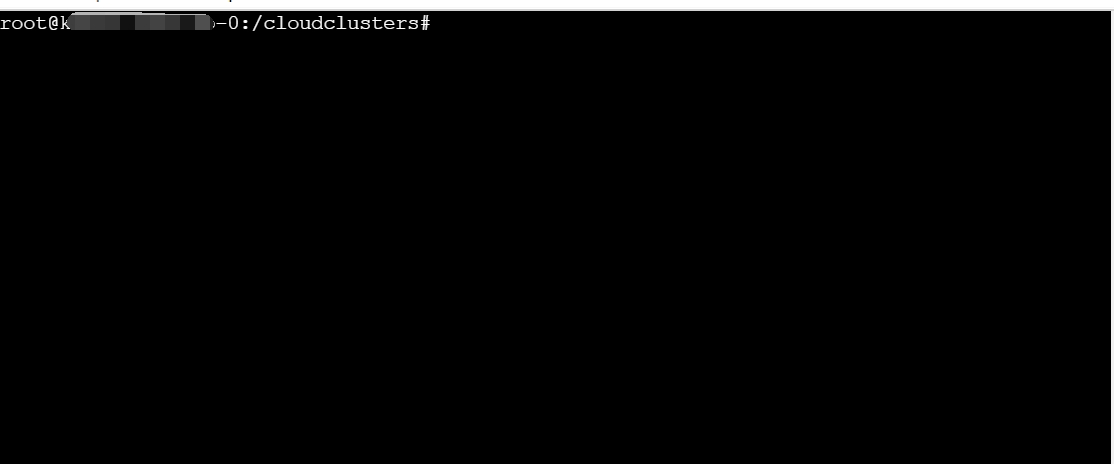
Click the Connect button to initiate a shell session. You can issue commands in it.
3. Create a topic in the Shell
Connect to Zookeeper and create a topic by issuing the following code.
export KAFKA_OPTS="-Djava.security.auth.login.config=/cloudclusters/config/kafka/kafka_jaas.conf"
 kafka-topics.sh --create --zookeeper localhost:2181 --replication-factor 1 --partitions 1 --topic <Topic_name>
Note:Replace the <Topic_name> with the topic name you would like to create.

4. Create a user in the Shell
Connect to Zookeeper and create a user with the following code.
kafka-configs.sh --zookeeper localhost:2181 --alter --add-config 'SCRAM-SHA-256=[iterations=8192,password=<PASSWORD>],SCRAM-SHA-512=[password=<PASSWORD>]' --entity-type users --entity-name <USERNAME>
Note:
<USERNAME>: username for the new user
<PASSWORD>: password for the new user.

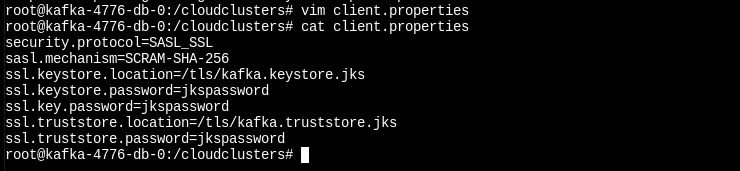
5. Create the client.properties file
This file is required for connecting to the Kafka Server.
security.protocol=SASL_SSL
sasl.mechanism=SCRAM-SHA-256
ssl.keystore.location=/tls/kafka.keystore.jks
ssl.keystore.password=<jks_password>
ssl.key.password=<jks_password>
ssl.truststore.location=/tls/kafka.truststore.jks
ssl.truststore.password=<jks_password>
Note:
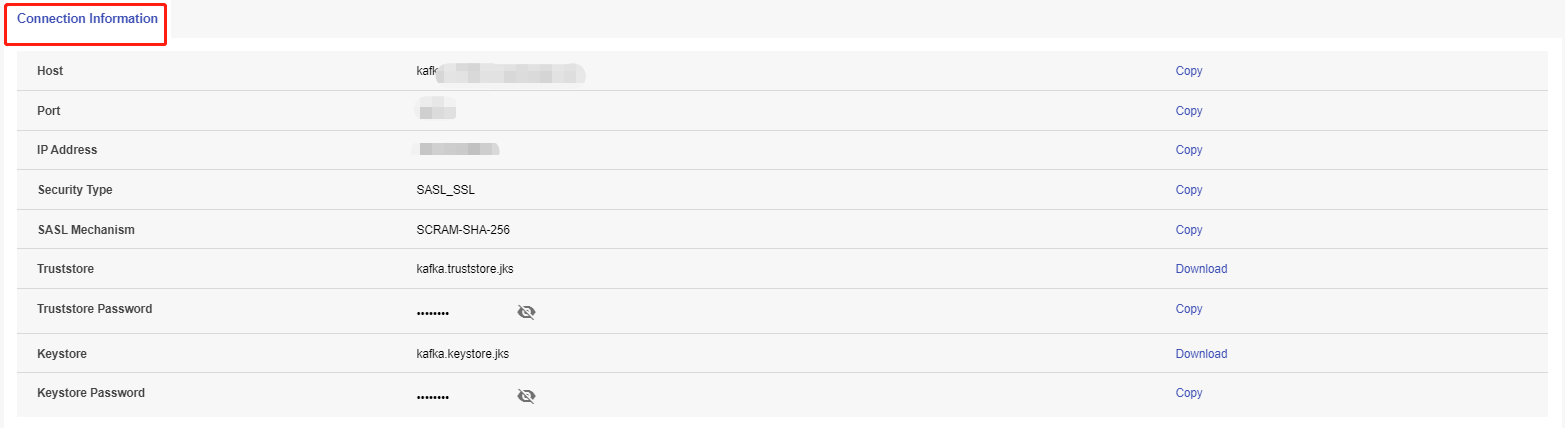
You can get the <jks_password> under the Connection Information section on the Overview page.
6. Kafka Producer Connects to Kafka Server
Get the Host and Port information under the Connection Information section on the Overview page.
Kafka Producer push messages to a topic.
kafka-console-producer.sh \
 --producer.config /cloudclusters/client.properties \
 --broker-list <Host>:<Port> \
 --topic <topicname>
Note:
<topicname>: the topic name that Kafka Producer would like to push messages to.

7. Kafka Consumer Connects to Kafka Server
Get the Host and Port information under the Connection Information section on the Overview page.
Kafka Consumer pull messages from a topic.
kafka-console-consumer.sh \
 --consumer.config /cloudclusters/client.properties \
 --bootstrap-server <Host>:<Port> \
 --topic <topicname> \
 --from-beginning
Note:
<topicname>: the topic name that Kafka Consumer would like to pull messages from.

Please note:
You should always run 'apt update' before any 'apt install' operations.
Softwares or packages installed via command "apt install" will be lost when the container is restarted.
The data and configuration files of your apps are stored in directories /cloudclusters.
Clients can manage web application services by supervisor CTL:
supervisorctl start/stop/restart zookeeper
supervisorctl start/stop/restart kafka